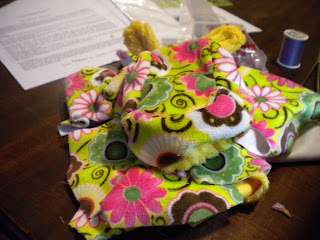
Showing posts with label Toy making. Show all posts

Friday, July 26, 2013

Making My First Dragon Softie

You may be familiar with the now classic "sleeping baby dragon pattern" by Naomi @ NimblePhish. You can find sewists selling dragons made from the pattern in the $100 range all over the place on Etsy and Facebook. I love the pattern, and hope to make it one day for an adult recipient since the appendages are all sewn by hand (using a ladder stitch or button joints). The resulting dragons are gorgeous, but I would fear for their safety if they ever met up with my two year old.

So, you can imagine my excitement when I heard that NimblePhish was introducing a new toddler-friendly dragon, "Doughnut." Unlike his older brother, Doughnut is entirely machine sewn in a single structure (except the wings). I picked up the pattern in a heart beat, and pulled out some dark purple cotton velour that I had been holding on to. About twenty-seconds in to pattern cutting I realized that cotton velour is a delicate beast, so I applied fusible fleece to each piece (for the record, that step takes forever!). Then I added a few splashes of corduroy in lime green and orange for contrasting details. Finally, I ended up with a beautiful pile of pieces.

And then came a sewing extravaganza, which actually took place a few weeks ago before our home renovation projects. The sewing went smoothly once I got his feet sewn on in the right direction, but I would certainly consider this little guy an intermediate level pattern. There are some tricky seams, and generally very little detail or explanation. But, that said, anyone with modest sewing experience (or a lot of drive!) could make their way through this one.
Even though I finished his "skin" awhile ago I wasn't able to stuff him until now, thanks to the arrival of new eyes from 6060 and a new batch of wool stuffing. Unfortunately, while I was stuffing him I realized that something was funky. As you can see, he is a little slimmer and a little taller than the pattern picture. My best guess is that I misinterpreted the cross-grain/length-wise symbols on the pattern pieces, and ended up putting the stretch in the wrong direction. Easy enough to do since I was also compensating for the nap direction. But still, argh. Add in the fact that he is/was intended to be a special birthday present for an amazing friend's son next week? Double argh.
I debated sending him to the Island of Misfit Toys, but thought better of it (for now!). I've been assured that he is presentable, just different than planned. 

Even so, I decided to add a little more personality and charm where and if I could (read: I lay awake for hours trying to figure out ways to redeem him) So, I fashioned a snap-on diaper for him, and made a cut-out for his tail. I also added sleepy eye-lids, which are a feature in NimbleBit's other patterns. And lastly, I added a little bling to his under-wings in the form of dark purple silk. I had to hand-baste the wings before machine sewing, top-stitching was a @%&$@$ challenge, and the silk didn't photograph well, *but* it feels lovely. I think little hands will love it. But for my sanity's sake, I'm never ever sandwiching (real) silk and cotton velour together again. I promise you that much.


But for now, he is done, though I might decide to pin his ears down. I am probably going to vacillate between exiling him to the Island of Misfit Toys and giving him as a gift about a dozen times between now and next week.  It stinks when you work on something and it doesn't come out how you expected. Especially when it's a gift for someone special. I'm hoping that he'll grow on me if I just step-away. Step away! :)


Wednesday, June 5, 2013

Cannot Escape the Plush


I've been on a fabric diet, and I can't seem to stop making softies. Not that I'm complaining, but I swear this sudden deluge of fluff was unplanned. I promise to get back to quilting soon. I have my first all-solids quilt planned and can't wait to start!

But, back to this little foal (donkey? mule?)... My original inspiration came following the news of Moore's devastating tornadoes. I had really hoped to find him a home there, with a little boy or girl who might appreciate the comfort. Try as I might though, I couldn't find anyone who was able to find him a home -- which is completely understandable. Handmade toys are a bit of a niche thing. As it turns out, hospitals generally won't take stuffed animals either because of the infestation risk. Ah well, lesson learned.

At any rate, on the face of it, this seemed like a pretty easy project. The pattern came from Jill Hamor's book Storybook Toys Sew 16 Projects from Once Upon a Time Dolls, Puppets, Softies and More . (As an aside, if you haven't checked out her blog,  you should. The eye candy is amazing). The horse is my favorite project in the book. I just love his vintage look. In fact, I loved this horse so much that I decided to make a very similar horse in royal purple (Jill's was navy blue).

Well, as it turns out, I'm still a bit of a novice at toy-making.  I really struggled with this pattern, and there are quite a few imperfections in this guy. For example, you need to hand stitch the head gusset around the muzzle first (as seen in the top right picture in the mosaic) because that curve is a little too intense for a sewing machine to handle on its own. Not to mention the fact that I was also fighting the mane and ears that were tucked inside.  

Well, I'm too impatient for that kind of artistry. His crooked head just goes to prove that, ha! Luckily for me, his crookedness translated into "aw, the horse is tilting his head." Phew :)

I also decided (a little too boldly!) to modify the pattern and give him three dimensional feet (it calls for the legs to come together as a two-dimensional seam). I used some of the techniques outlined in Stuffed Animals: From Concept to Construction to draft his foot pads. You can see my template in the bottom right photo above (it's the light blue circle). Man, those little hooves were fiddly! The footpads were small and required sewing through 5-7 layers of wool in places. Not easy, but I'm glad I made my way through it... though only somewhat successfully. One of his hooves came out tiny and stunted, see it up there? He's been affectionately dubbed Nemo ever since. 

Nemo's legs are stuffed with cotton batting scraps to give him enough structure to stand on his own. The rest of him is stuffed with squishy wool. I'm happy to report that the firm stuffing job went a long way in correcting his stunted hoof. His mane is wool yarn, and his hooves are 100% wool felt. Nemo's saddle was made from Kate Spain's Good Fortune collection for Moda. His saddle includes a metal snap (new trick for me!), so it can come on and off as needed. 

As for his fate? My mom insisted on taking Nemo herself, so he's going to make a not-so-surprise-birthday-present for her tomorrow. I know he'll be loved there, and I'm pretty sure that she will take good care of him :)

And now I'm going to swear off curved seams and 3D construction for awhile. For real this time!

Saturday, May 25, 2013

A Wombat for Grammy

It's been a very rainy week, and I didn't dare bring this guy outside for pictures. So I setup an  impromptu quilt-backdrop, and squeezed in a photo shoot just before we headed out for Grammy's 50th Birthday Bash.

Like Poppet, this guy is made out of contrasting corduroy fabrics - a paisley print and a solid leaf green, both from Kaufmann's 21 wale corduroy collection. His nose and claws are black wool felt, and he is also stuffed with wool for the best squish.


Oh, and he originally started out with three eyelashes on each eye. I'd blame the toddler, but it was actually me who got overly zealous when stuffing. Whoops!

Tuesday, April 30, 2013

Poppet the wooly wombat

I adore wombats. It's a fondness that started with the book Sometimes I Like to Curl up in a Ball -- a wonderfully sweet story, made even better by the fact that it was our very first baby book. I received it early in my pregnancy, but definitely a pivotal moment for me. Needless to say, it's been a very special book for BabyBee and I since the day she was born.

At any rate, when I saw the "Wodger Wombat" pattern at Funky Friends Factory it was just a matter of time before he was mine. I even cut into my Chiocopee Corduroy for this one. To say I was intensely picky about how this one came out would be an understatement. Since being "finished" she has endured more than a little plastic surgery, but more on that in a second. Even so, I am finally satisfied with her, and have named her "Poppet."

The wombat pattern has quite a few pieces (at least compared to the Hippo), and comes together in a really cool way. And the corduroy was also a pleasure to sew with. In fact, everything seemed to be coming together perfectly until I stuffed her. Something about her eyes just wasn't quite right. They almost look uneven, except that they aren't (I took out a ruler and everything!). And her nose was crooked. See for yourself...
Pre-face lift photos, not pretty!

So, I took out all the stuffing, and gave her a bit of an eye lift. To do that, I looped a strand of embroidery thread through the backings on the safety eyes, and tightened. I also restitched her nose, lining it up along the curve of her muzzle (as opposed to centering it over the seams). Those two changes made a pretty big difference. When I restuffed her I was very happy to come out with this:


As you can see, pulling in her eyes contoured her nose nicely, and puffed out her cheeks. I think she has a much sweeter expression as a result.

If I ever make a second wombat, I'll be a little more generous with the darts. The instructions suggest 1/8inch seam lines for the darts, but I'm programmed to use scant seam allowances from my quilting.  Next time I would be sure to use a generous 1/8 inch allowance on the darts, and definitely not a scant 1/8 inch. Whoops.

The other huge lesson learned? Wool stuffing. I'm a complete convert. It is squishy, but retains it's shape well  too. And my hands enjoyed a really nice moisturizing session (well sessions) thanks to the residual lanolin in the wool. Now I just need to find a way to get a huge five or ten pound box delivered!

I think this will be my last stuffed animal for a little while, I'm ready to dive back into some quilting. Straight lines, here I come! :)

Tuesday, April 23, 2013

3 Reasons Why Toy-making Means More Shopping

I'm officially going through a softie making-phase. I thought I could stop at two Heather Hippos after finding that pattern on Craftsy. Except then I entered my Momo Hippo into the Funky Friends Factory's "Make My Monday" Contest, and to my surprise (and honor!) I won. And so I was forced to choose a favorite from all of Pauline's creations -- which was impossible. In the end I chose Raff the Giraffe as my prize, and bought Wodger the Wombat. And then I went shopping. In a big way.  Turns out quilting and toy-making aren't as compatible as I thought, here's why:

1. Quilting cottons are fun for toys, but fuzzy fabrics are *more* fun! Witness project fuzzy stash acquisition,  just a week in the making: It's all corduroy, minky, and one bit of linen. Not pictured? Some seriously awesome pink and green faux-fur. For the record, there are two half yards of Chicopee corduroy in there, and they.are.divine. I don't see these going into a quilt, um, ever.


2. Batting is not the same as stuffing. At one point I told myself that toy-making would be a good way to use up all those cotton batting scraps. That would work, and probably even work well. Except cutting up all those scraps into itty-bitty bits would take time, and I'm a sucker for instant gratification. So I stuffed with cotton stuffing. And then tried poly-fil. And now there is some sheep's wool stuffing on order. Going forward I plan to stuff minky with polyfil, but I really feel cotton/corduroy toys benefit from natural fillers like wool and cotton.

3. I only quilt with Aurifil cotton thread, but I think I prefer polyester for softie making. So now I need build a second thread collection. Awesome.

Other strange consequences?

1. I will go to great lengths to procure *wool* felt. Real wool felt is my new candy. Any acrylic felt left in my craft bin has been relegated to toddler-fodder.

2. I will never look at a pair of hemostats the same way. I almost asked my doctor for a pair yesterday (they were headed for the trash!), but decided against it at the last minute.

And for all this craziness, I decided to reward myself with a toy. Because I'm 10. And, less selfishly, so Henrietta can have a little wombat friend for tea time. So excited about this one!


It's a good thing I have the best and most supportive husband ever!

Sunday, April 21, 2013

Homemade birthday presents

My niece is turning five this week, and I really wanted to have a handmade gift for her. After last week's success with Henrietta, I thought another stuffed animal was in order.

Unlike Henrietta, who is made entirely of minky fabric, this hippo is made from a mix of quilter's cotton and minky. As it turns out, it's a lot easier to sew accurate seams with cotton (no sliding layers!), but the cotton also highlights puckers and/or pleats. Overall, a lot more seam ripping was involved in this guy. Lesson learned: minky might be a pain, but it's a lot more forgiving.

For the body, I chose the signature fabric from Momo's Oh Deer! line in creamsicle. I've been hoarding a yard of this print in my stash, and I was so happy to  find the perfect project for it. Such a large print can be tricky to use in a quilt, but it was a perfect match for a stuffed animal!

I also picked up a SewLine Fabric Pencil for this project, and right now it's my favorite new tool. Using the pencil I was able to I fussy cut each pattern piece to showcase a different portion of the fabric. In addition to tracing the pattern pieces, I used the pencil to sketch in my seam lines. I think that made a huge difference in my accuracy (Oops, thought I had taken a photo of the marked pieces  but looks like I somehow missed it. Maybe next time!). I'm really happy with all the secondary designs hiding in this hippo, hopefully my niece will enjoy picking them out, too.


I have to say, I'm a little tempted to keep this guy here with us. Just look at how cute he and Henrietta are together! But, alas, BabyBee helped stuff him with hugs meant for her cousin (literally hugging the stuffing before she put it in), so his days here with us are few. I hope he is loved and played with for years to come!


As an aside... Pretty sure there are (more than ) a few softies in my future. My copy of Stuffed Animals from Concept to Construction arrived Friday and I.am.smitten. I haven't been able to put the book down, and I can't wait to start sewing through it. Until now I haven't  been able to find a good resource for softies, which is crazy to me given the availability of modern quilting books/blogs/magazines/craftsy classes.  Not only is the book filled with great projects, but it teaches you how to design your own patterns. Super excited to dive in!


Sunday, April 14, 2013

Meet Henrietta


After March's quilting insanity I took a break, and packed up my sewing machine. I thought that if I removed the temptation I might even tackle some home improvement projects. Haha. Yeah, that didn't happen. As it turned out, I pieced a gazillion paper hexagons instead, but that's another blog post entirely.

Admitting defeat, I brought back my sewing machine yesterday. Well, I must have been *really* hungry for some sewing because I churned out this charming little lady in one afternoon/evening. It was wonderful to sew again, and this little project packed a lot of instant gratification.

I have never sewed anything like this before, and there was definitely a learning curve (literally, there's a lot of  curved piecing!). I also made things ridiculously more difficult on myself by choosing minky fabrics. I've never done any curved piecing either. Combining minky + curves + first toy was a cruel thing to do to myself. But, it was great practice, and now I'm much more confident in all three. Though, honestly, what on earth was I thinking?

The main body fabric is an old out of print Robert Kaufman minky that I had in my stash. It is has cutest apple green background with yellow, chocolate brown and pink flowers. To offset the main fabric, I chose a mango-minky with ribbed texture. I absolutely love the color and texture combination of the two, though I can't seem to get a shot that's true to color.

The pattern is by FunkyFriendsFactory, and can be found here: Heather the Hippo or on Craftsy. I tripped up a few times (I got confused about the ear placement, but figured it out in the end), but overall this pattern was wonderfully easy to follow -- even for this total newbie. The one thing I wasn't expecting? The three hours it took me to trace and cut out all these pieces.  Next time I'll queue up some good TV :)

The sewing itself went pretty smoothly, though there were a few dark moments. Like this one. I stared at this seam for like 5 minutes in disbelief. I took a deep breath, pinned it, and was still unconvinced. But, my Janome and I pushed through it, and amazingly enough it worked!

I also re-sewed one ear in a record FOUR times. Tricky little sucker. Thankfully my sister called in the middle of round II, so the seam ripping passed by quickly enough.

But mostly there were a lot of highs...


Here she is with her head all finished. After struggling with the ear placement, this was a great victory.


And here she is really starting to come together. I was so excited when she transformed from an amorphous blob into something vaguely animal-shaped. 
And here she is with her head stuffed and freshly added eyes. The felt eyelashes were my own idea, and I'm pretty proud of them. Not sure how they will hold up to a toddler's wear and tear, but I love them!


 And here's the original finish shot. Taken very early in the morning, but ready to surprise a little girl :)


And lastly, a tummy shot. How cute is that yellow?! And the textured minky couldn't be more perfect here. 


In case you can't tell by the photo overload, I'm pretty proud of this project. It was much more technical than anything I've done, and definitely a far cry from the 2D world of quilting. I'm already planning a second (in quilter's cotton this time!) for my niece's upcoming birthday.

And Henrietta's new owner? Well, she is beyond thrilled. On first sight, she declared Henrietta "so huggy" and they played very nicely together all morning. We've since discovered Henrietta loves kiwis and watermelon from the play kitchen. And Henrietta has been given a place of honor during naps/nighttime, directly in the bed :)